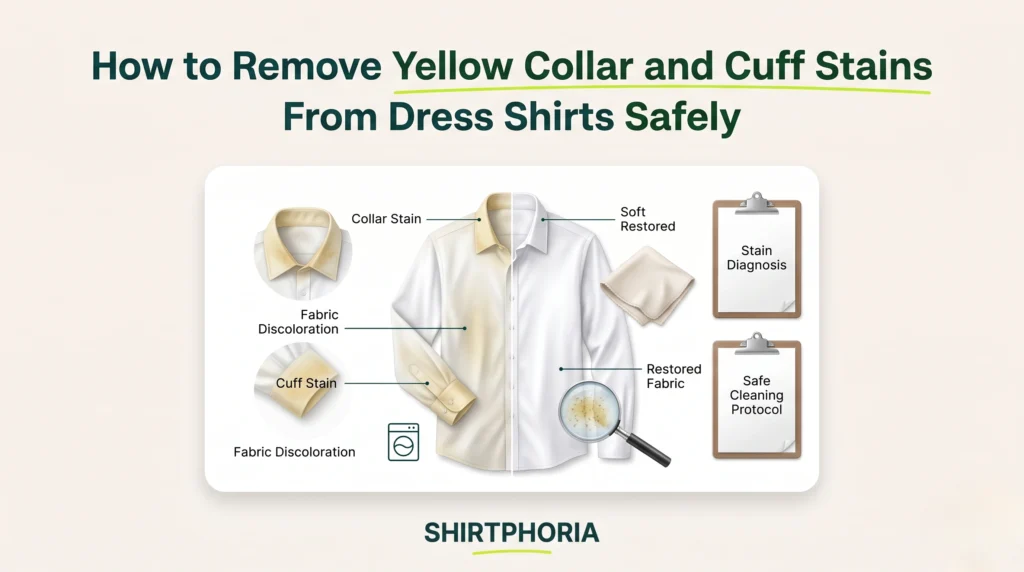
How to Remove Yellow Collar and Cuff Stains From Dress Shirts Safely
You can often reduce or remove yellow collar and cuff stains from dress shirts by following a structured method: inspect the fabric, grade the stain, apply enzyme liquid detergent within product-label limits, wash within the care-label limit, and verify the stain is gone before using dryer or iron heat. Standard washing routines often fail because collar bands and cuff edges collect concentrated body oil, sweat residue, and skin-contact soil through repeated friction against the skin.
This guide explains why yellow collar and cuff stains form, how to treat them with enzyme liquid detergent, how to avoid heat-setting, and how to decide when to stop before fabric damage begins. Effective yellow collar and cuff stain removal relies heavily on following manufacturer instructions, as care-label instructions and product-label instructions override all general stain-removal advice.
To break down these specific marks, an enzyme liquid detergent is highly recommended. According to the American Cleaning Institute, lipase enzymes target fat-based stains such as oils and human sebum, which directly correlates to the body-oil buildup found on collars and cuffs.
Stain Removal Cheat Sheet
Download our quick-reference worksheet. Keep it in your laundry room to safely grade and treat collar stains without damaging your dress shirts.
Why Do Shirt Collars and Cuffs Turn Yellow?
Shirt collars and cuffs often turn yellow when body oil, sweat residue, skin-contact soil, and repeated friction concentrate residue along the neck and wrist contact zones. This specific mixture accumulates deep in the fabric fibers. Over time, the localized residue embeds into the weave, resists standard water-based cleaning, and sets into the garment if exposed to heat before being fully washed away. Using an enzyme liquid detergent helps target this specific body-oil buildup by breaking down the fats and oils that standard detergents might miss.
How Sweat and Body Oil Stains Build Up on Collar Bands and Cuff Edges
Daily friction pushes body oil, sweat residue, and skin-contact soil into collar bands and cuff edges, creating concentrated buildup in the areas that rub most against skin. The neck and wrists are frequent contact zones, meaning these parts of the shirt endure the most physical pressure during daily wear. Repeated wear combined with repeated incomplete washing causes this hidden residue to accumulate, making the yellowing more visible over time. This yellowing is a combined residue problem of sweat and oil, not just one single chemical cause.
Why Normal Washing Often Fails to Remove Deep Collar and Cuff Stains
A normal wash may be less effective when concentrated oily buildup is not pre-treated directly before the shirt enters the wash cycle. A standard normal wash cycle lacks the localized contact needed to break down a heavy barrier of oil, meaning the oily residue remains on the fabric. Oil-based residue is harder to remove with water alone and requires direct detergent contact before washing. Lipase enzymes target fat-based stains such as oils and human sebum, working directly on the lipids trapped in the collar band. The effectiveness of a normal wash depends heavily on the detergent formulation, stain severity, fabric type, and care-label limits.
Why Heat Can Make Remaining Stains Harder to Remove
Dryer heat can set remaining collar and cuff residue deeper into fabric fibers, making yellow discoloration harder to remove later. Heat-setting is the process where high temperatures make remaining stain residue bond more firmly and become harder to release from the fabric. As advised by the Iowa State University Extension, wet laundry should be inspected before drying because dryer heat can set stains. Dryer heat sets remaining residue, which directly results in harder stain removal. Iron heat may also make remaining residue harder to remove, so ironing should wait until the stain is fully checked.
What Tools Are Needed for Yellow Collar and Cuff Stain Removal?
Successful yellow collar and cuff stain removal requires a small toolkit that improves detergent contact, controls friction, supports inspection, and prevents unnecessary heat exposure.
| Tool | Purpose | Safety Note |
|---|---|---|
| Enzyme liquid detergent | Can help loosen fat/oil-based and organic residue from collar and cuff buildup. | Follow the product label for dwell time and fabric limits. |
| Soft-bristled brush | Adds controlled friction without harsh abrasion. | Avoid stiff bristles and hard scrubbing. |
| White cloth or cotton swab | Helps test colorfastness before treating visible areas. | Stop if dye transfers. |
| Bright direct light | Helps inspect for remaining yellowing while wet. | Inspect before drying or ironing. |
| Wide contoured hanger | Supports the shirt while air-drying. | Use a wide hanger to help support the garment shape. |
How to Inspect Collar and Cuff Stains Before Treatment
Inspecting collar and cuff stains before treatment involves separating shirts by fabric type, reading the care label, grading the visible stain, and testing colorfastness before applying detergent to the main area. The Federal Trade Commission Care Labeling Rule requires that textile wearing apparel labels provide care instructions and warnings for ordinary care, which is why care-label guidance overrides general stain-removal advice. The care label serves as the strict decision authority for temperature, drying, bleaching, and ironing. Stop immediately if the fabric bleeds color during spot testing.
How to Separate Dress Shirts by Fabric Type and Care Label
Separating dress shirts by fabric type and checking the care label prevents one stain-removal method from being applied to fabrics with different shrinkage, heat, color, or friction risks. Fabrics such as 100% cotton, cotton/poly blends, Oxford cloth, and delicate weaves respond very differently to water temperature, brushing, and drying. The care label dictates the safe parameters for washing, drying, bleaching, and ironing. Keep in mind that certain polyester blends may hold oily residue differently than pure cotton, requiring close attention to the specified washing instructions.
How to Grade Yellow Shirt Collar Stains by Severity
Grading yellow shirt collar stains by severity helps match treatment strength to visible stain intensity without presenting the grade as an official textile-industry scale. This Grade A/B/C system is a practical home-care framework, not an official textile-industry classification.
| Stain Severity | Visual Sign | Treatment Level | Risk Warning |
|---|---|---|---|
| Grade A | Light yellow shadow | Enzyme liquid detergent pre-treatment plus normal wash, if product and care labels allow | Avoid over-brushing because light stains need minimal friction. |
| Grade B | Clear yellow ring | Enzyme dwell time plus soft brushing within product-label limits | Inspect while wet before drying. |
| Grade C | Dark oily buildup | Repeat gentle pre-treatment only if fabric remains stable and the stain improves | Avoid heat and stop if color loss, fraying, or seam weakening appears. |
How to Spot-Test Dress Shirt Collars and Cuffs Before Detergent or Brushing
Spot-testing a small, hidden area of the shirt with the chosen enzyme liquid detergent helps confirm colorfastness and reduces the risk of accidental dye transfer or fabric damage during the main treatment. Apply a small amount of diluted detergent to an inside tail seam, wait within the product-label test window, blot with a white cloth, rinse, and check for color transfer or texture change. Stop immediately if dye transfers or the fabric texture changes. Professional cleaning is the safer option for valuable or delicate shirts that fail the spot test.
Which Collar and Cuff Stain Method Should You Use by Fabric and Severity?
Selecting the correct collar and cuff stain removal method requires matching the fabric type with the assessed stain severity so treatment increases only when the fabric remains stable. The safest method is always the lowest-strength method that visibly improves the stain.
| Fabric Type | Light Yellowing | Defined Ring | Heavy Buildup |
|---|---|---|---|
| 100% cotton | Enzyme liquid detergent pre-treatment if label-safe | Enzyme liquid detergent plus soft brushing | Repeat cycle only if the care label allows normal washing and the fabric remains stable. |
| Cotton/poly blend | Slightly longer enzyme contact only within product-label limits | Gentle agitation plus careful inspection | Low-friction brushing; avoid aggressive scrubbing. |
| Oxford cloth | Enzyme pre-treatment within label limits | Soft brushing along the weave direction | Extend dwell time only within product-label maximum; inspect for seam stress. |
| Delicate weave | Spot test first | Use minimal friction and avoid heat escalation | Consider professional care if the stain remains after one gentle attempt. |
How to Pre-Treat Yellow Collar and Cuff Stains With Enzyme Liquid Detergent
Pre-treating yellow collar and cuff stains with enzyme liquid detergent works best when the detergent contacts the stained area directly, sits only within product-label limits, and is lifted with gentle friction. Lipase-based detergent action breaks down fat-based stains such as sebum effectively. Always follow the product-label dwell time, as it overrides all general timing advice.
How to Apply Detergent Directly to Dry Collars and Cuffs
Applying enzyme liquid detergent directly onto dry collar bands and cuffs can concentrate the treatment on oily buildup before water dilutes the detergent. The fabric should remain dry for the initial application unless the product label explicitly states otherwise. Do not saturate the fabric excessively. Delicate fabrics require spot-testing first to ensure color stability. Dry application is highly effective, but product-label instructions always control usage.
How Long to Let Yellow Collar and Cuff Stain Pre-Treatment Sit Before Washing
A 15–20 minute dwell time can be used as a practical starting range only if the enzyme liquid detergent label allows that contact time. This range is a practical guideline, not an official universal standard. Product-label dwell time always overrides this general range. Too little dwell time leaves the oily residue intact, while too much dwell time may let the product dry on the fabric or increase color and fabric risk. Do not soak garments overnight unless both the product label and care label explicitly permit it.
How to Brush Stained Areas Without Damaging Fabric Fibers
Brushing stained areas gently with a soft-bristled brush or clean toothbrush adds controlled friction that helps lift loosened residue without harsh abrasion. Soft brushing adds controlled friction, which lifts loosened residue smoothly from the weave. Do not use vigorous scrubbing, stiff bristles, circular grinding, or apply heavy pressure that distorts seams. Too little agitation leaves residue embedded in the shirt, while too much agitation will pill, fray, or severely weaken the fabric.
| Step | Action Result | Failure Boundary |
|---|---|---|
| Apply detergent to dry fabric | Concentrates enzyme contact on collar/cuff buildup | Too little detergent contact leaves buildup untouched. |
| Wait within label-safe dwell time | Gives the treatment contact time and loosens residue | Too long may let product dry or stress sensitive fabric. |
| Brush gently | Adds controlled friction to help lift buildup | Hard scrubbing can damage seams and surface texture. |
How to Wash Collar and Cuff Stains Without Damaging the Shirt
Washing collar and cuff stains safely requires using an appropriate temperature within the care-label limit, enough agitation to flush loosened residue, and no dryer heat until stain removal is verified. The care label acts as the final authority for washing instructions, cycle selections, and safe drying methods.
How to Choose the Safest Water Temperature from the Care Label
Choosing the safest water temperature means reading the care label and selecting an appropriate setting that supports cleaning without increasing shrinkage, fading, or fabric-damage risk. Warm water may help oily soil removal when the care label explicitly allows it. Cooler water is often safer for dark, delicate, or shrink-prone shirts. Never exceed the care-label temperature to chase stain removal.
How to Use Gentle Friction on High-Buildup Collar and Cuff Areas
Using gentle friction on high-buildup areas involves a short localized massage on the collar fold or cuff edge to help the pre-treatment penetrate before machine washing. This action serves as a final manual check before loading the washing machine. Apply light pressure, avoiding heavy scrubbing. The goal is to aid penetration and residue movement, not to abrade the fabric. Too little friction leaves residue trapped in the weave, while too much friction damages the garment’s structural fibers.
How to Run the Correct Wash Cycle After Collar and Cuff Pre-Treatment
Running the correct wash cycle involves transferring the pre-treated shirts into a care-label-approved wash cycle that can flush out loosened residue and detergent. Machine agitation effectively removes the loosened residue from the garment. Select a normal, permanent-press, or gentle cycle only when the care label allows it. Avoid heavy-duty wash cycles as a default setting for dress shirts.
How to Check Collar and Cuff Stains Before Drying or Ironing
Checking collar and cuff stains before drying or ironing is the critical safety step because dryer heat can set remaining residue and make the stain harder to remove. Wet laundry must be fully inspected before it enters the dryer. Wet inspection always comes before dryer or iron heat.
How to Inspect Collar and Cuff Stains Under Direct Light
Inspecting collar and cuff stains involves holding the wet interior collar bands and cuff edges under bright, natural, or direct light immediately after the wash cycle finishes. Wet fabric frequently masks light stains, making bright light essential. Inspect the inside collar band, collar fold, cuff edge, and cuff interior thoroughly. The stain grade should drop or disappear completely before any dryer heat is used. Inspect everything before drying or ironing.
Why You Should Avoid Heat if Cuff Yellowing or Collar Stains Remain
You should avoid dryer heat if cuff yellowing or collar stains remain visible because dryer heat can set remaining stains and make them harder to remove. Dryer heat sets residue, causing harder removal later. Wet laundry should be inspected before drying to avoid this risk. If yellowing remains, do not use the dryer. Air-drying serves as the safe holding step when stains remain visible. Avoid ironing stained areas until the stain is fully checked, as iron heat carries similar risks.
How to Air-Dry Dress Shirts After Stain Removal
Air-drying dress shirts after washing keeps the shirt away from dryer heat while preserving the option to repeat treatment if faint yellowing remains. Use a wide hanger to properly support the shirt’s shoulders while it dries. Air-drying is the safest route when the stain’s status is uncertain. Air-drying does not remove stains; it prevents heat exposure after washing to ensure the fabric remains safe for a second treatment round.
| Rule | Reason | Example |
|---|---|---|
| Do not use dryer heat if yellowing remains. | Dryer heat can set remaining stains and make removal harder. | Check the wet collar before drying. |
| Air-dry if the stain is uncertain. | Air-drying preserves the option to repeat treatment. | Hang on a wide hanger. |
| Follow care-label drying and ironing limits. | Heat-sensitive garments may shrink, distort, or change texture. | Follow dryer and iron symbols before applying heat. |
How to Fix Collar and Cuff Stains That Remain After Washing
Fixing collar and cuff stains that remain after washing requires repeating only label-safe treatment steps, adjusting contact time within product-label limits, and stopping when fabric damage appears. Focus on conservative, fabric-safe troubleshooting. Monitor the garment closely for color transfer, fraying, texture change, and yellowing reduction.
How to Repeat Pre-Treatment on Stubborn Dress Shirt Collar Discoloration
Repeating pre-treatment on stubborn dress shirt collar discoloration involves re-applying enzyme liquid detergent only after the shirt has air-dried without dryer heat and still passes a fabric-stability check. The shirt must be air-dried without any dryer heat before initiating the second round. The second pass requires lighter brushing than the first attempt. Stop immediately if the fabric shows fraying, fading, thinning, or seam stress. Do not apply any heat between these attempts.
How to Adjust Dwell Time for Heavier Buildup
Adjusting dwell time for heavier buildup means extending contact time only within the enzyme liquid detergent label’s maximum safe limit. Denser fabrics like Oxford cloth may tolerate the higher end of a product’s recommended time, but this is never a reason to ignore the label limits. Product-label limits strictly override all general timing. Too little dwell time under-treats the deep stain, while too much dwell time stresses the color and fabric integrity.
When to Stop Treatment to Avoid Fabric Damage
Stopping treatment is necessary when repeated attempts stop improving the stain or when the fabric shows color loss, fraying, thinning, texture change, or seam weakening. Limiting yourself to 2–3 attempts serves as a conservative home-care boundary, not an official textile-care standard. Stop sooner if any fabric damage appears. Professional cleaning is highly recommended for valuable, delicate, or structurally weakened shirts. A faint shadow is sometimes safer to accept than destroying the collar band completely.
| Mistake | Risk | Safer Fix |
|---|---|---|
| Drying before checking | Dryer heat may set remaining yellow residue. | Inspect collar and cuffs while wet. |
| Scrubbing hard | Collar edges may fray or pill. | Use soft brushing only. |
| Using unsuitable water temperature | Shrinkage, dye loss, or fabric distortion may occur. | Follow care-label temperature. |
| Treating all fabrics the same | Cotton/poly blends and delicate weaves may respond differently. | Choose method by fabric and severity. |
| Leaving pretreatment too long | Product may dry on fabric or stress color. | Stay within product-label dwell time. |
| Repeating treatment too many times | Fabric weakening or color loss may occur. | Stop after a conservative number of careful attempts, or sooner if fabric damage appears. |
What Should You Avoid When Removing Yellow Collar and Cuff Stains?
Avoiding the wrong stain-removal actions is as important as choosing the right treatment because dryer heat, harsh friction, bleach misuse, and label violations can damage the shirt faster than the stain itself. Care labels and product labels provide essential limits that override generalized advice. Review this mistake filter to ensure you are treating the fabric safely.
- Do not use dryer heat while yellowing remains.
- Do not iron stained areas until the stain is fully checked.
- Do not scrub collar edges aggressively.
- Do not exceed the care-label wash temperature.
- Do not use chlorine bleach unless the care label allows bleaching.
- Do not mix cleaning chemicals unless all product labels explicitly allow that combination.
- Do not leave pretreatment drying on fabric unless the product label permits it.
- Do not repeat treatment endlessly on a weakening collar band.
- Do not treat delicate, valuable, or color-unstable shirts like standard cotton shirts.
How to Use Treatment Boundaries Without Under-Treating or Over-Treating the Shirt
Treatment boundaries help you avoid two opposite failures: under-treating the stain so residue remains, and over-treating the fabric until the shirt begins to weaken. Every treatment variable has a safe middle zone. Increase treatment strength only if the stain visibly improves and the fabric remains structurally stable.
| Treatment Variable | Too Low Harm | Safe Middle Zone | Too High Harm |
|---|---|---|---|
| Detergent contact | Oil-based residue remains under-treated. | Apply enzyme liquid detergent directly to the stained area if the product label allows. | Over-saturation may stress delicate fabrics or leave residue. |
| Dwell time | Stain remains because the detergent has too little contact time. | Use product-label dwell time; 15–20 minutes can be a practical starting range only if label-safe. | Product may dry on fabric or increase color/fiber risk. |
| Brushing pressure | Residue remains embedded in the weave. | Use soft, controlled friction. | Fibers may pill, fray, or weaken. |
| Water temperature | Oil removal may be weaker. | Use an appropriate temperature within the care-label limit. | Shrinkage, fading, or fabric damage may occur. |
| Repeat cycles | Stain remains visible. | Repeat gently only if fabric remains stable and stain improves. | Fabric may weaken, fade, or fray after too many attempts. |
How to Prevent Yellow Collar and Cuff Stains From Returning
Preventing yellow collar and cuff stains from returning requires addressing fresh body oil and sweat residue before repeated wear and heat exposure make the buildup harder to remove. Adhering to practical, low-risk routines keeps your shirts looking cleaner over the long term.
How to Rinse Collars Before Body Oil Buildup Hardens
Rinsing collars lightly or wiping them with a damp cloth after heavy wear can remove surface sweat residue and body oil before they form heavier buildup. This quick post-wear habit is highly effective for heavy sweaters or individuals living in hot climates. The goal is early residue removal, not a full wash session.
How to Treat Collar Bands Before Every Wash to Stop Ring Around the Collar
Treating collar bands before washing with a light enzyme liquid detergent pre-treatment can reduce the formation of a deeper ring around the collar when the product label allows it. Consistent low-level treatment reduces the need for aggressive deep cleaning later. Apply the treatment shortly before washing unless the product label explicitly allows for longer contact time.
How to Avoid Heat-Setting Invisible Sweat and Oil Residue
Avoiding heat-setting invisible sweat and oil residue means keeping uncertain collar and cuff areas away from dryer heat until the fabric has been inspected. Invisible residue can yellow later, and dryer heat increases the removal difficulty substantially. Air-drying acts as an excellent preventative measure when stain status is uncertain. Care-label-approved machine drying is perfectly acceptable once stain removal is verified.
How to Validate That Collar and Cuff Stain Removal Worked
Validating collar and cuff stain removal means checking stain visibility, fabric texture, color stability, and seam condition before deciding whether to dry, repeat treatment, stop, or seek professional care. Do not rely on casual visual checks or smell alone.
| Validation Check | Pass Signal | Fail Signal | Decision |
|---|---|---|---|
| Direct light stain check | No yellow shadow remains while wet. | Yellow ring or shadow remains. | Repeat gentle pre-treatment without dryer heat. |
| Colorfastness check | No dye transfers to a white cloth. | Dye transfer appears. | Stop and use professional care. |
| Fabric texture check | Collar edge feels smooth and stable. | Pilling, fuzzing, thinning, or roughness appears. | Stop brushing. |
| Seam check | Collar/cuff seam remains firm. | Seam looks weakened or frayed. | Stop treatment. |
| Grade improvement | Grade B becomes Grade A or clear. | Grade C remains unchanged after conservative repeated treatment. | Stop or seek professional cleaning. |
How to Follow a Yellow Collar and Cuff Stain Removal Checklist for Dress Shirts
Following this yellow collar and cuff stain removal checklist ensures you complete the full process from inspection to drying without skipping a critical safety step.
Performance Tracker
Log your stain removal attempts to track your success rate over time. Your data is saved locally in your browser.
How to use this tracker?
This tracker is a log that helps you identify which of your shirts are easy to clean and which ones retain stubborn stains. If you consistently see “Failed” results for certain shirts, it indicates that you may need to adjust your method or seek professional cleaning services.
| Shirt | Grade | Result |
|---|
Terms Explained
| TERM | DEFINITION |
|---|---|
| Enzyme liquid detergent | A cleaning formula containing specialized proteins that actively break down organic, fat-based stains rather than just washing them with water. |
| Lipase | A specific type of enzyme engineered to target and dissolve lipid (fat) molecules, making it highly effective against sebum. |
| Sebum | The natural, oily substance produced by the skin that traps dead skin cells and sweat residue, acting as the primary glue for collar rings. |
| Heat-setting | The irreversible process where high temperatures from a dryer or iron bake remaining oil and sweat residue permanently into fabric fibers. |
| Dwell time | The required duration a stain-treatment product must sit undisturbed on the fabric to safely break down residue before washing. |
| Colorfastness | A fabric’s ability to hold its dye securely without bleeding, transferring, or fading when exposed to water, friction, or cleaning agents. |
Conclusion
In conclusion, tackling ring around the collar effectively requires moving away from standard washing habits and using targeted enzyme pre-treatment, gentle physical agitation, strict care-label discipline, and dryer-heat avoidance. The core of this process is safely loosening the residue barrier created by body oil and sweat residue. Careful inspection and label-safe dwell time are vastly more effective than aggressive scrubbing or high heat. Product labels and care labels always override general advice. By making this systematic inspection and pre-treatment part of a regular laundry routine, you can significantly extend the lifespan and professional appearance of your dress shirts.
Technical Disclaimer
The “Stain Removal” protocol, performance trackers, and guidelines provided in this article are intended for general educational and informational purposes only. Every fabric, dye, and garment construction reacts differently to water, heat, and mechanical agitation. You should always prioritize and strictly follow the manufacturer’s official care label instructions attached to your specific garment. Shirtphoria is not responsible for any damage, shrinkage, fading, or fit distortion that may occur during your washing, drying, or reshaping processes.
© 2026 Shirtphoria. All rights reserved.