How to Build a Laundry Shrinkage Prevention Routine That Protects Your Clothes
A laundry shrinkage prevention routine can reduce avoidable shrinkage mistakes by turning care-label checks, fabric rules, water temperature, and drying choices into a repeatable sequence before every wash. Ruined clothes are often caused by a broken process, not a lack of intelligence.
This guide explains why clothes can shrink, how to verify fabric rules, how to build a low-friction laundry check, how to track execution, and how to refine your setup when the system breaks.
Implementing this shrinkage prevention system reduces avoidable shrinkage risk; it does not guarantee that no garment will ever shrink. The care label should always override general fabric assumptions. Following care-label guidance and care symbols reduces shrinkage risk and supports consistent execution, without making unsupported scientific or behavioral guarantees.
Take the Laundry SOP offline. Download our printable PDF template to track your wash cycles and keep the fabric cheat sheet right in your laundry room.
Why Clothes Shrink in a Laundry Shrinkage Prevention Routine Context
Clothes can shrink during washing and drying when heat, moisture, fabric construction, and machine movement interact with fibers, allowing fabric dimensions to change. Shrinkage represents a fabric-care risk that depends heavily on heat, moisture, machine movement, fabric construction, and the chosen care method.
How Heat, Moisture, and Agitation Increase Shrinkage Risk
Heat, moisture, and mechanical agitation can increase shrinkage risk by making fibers more mobile and exposing garments to rubbing, twisting, and tumbling forces.
- Heat + Moisture + Movement → Increase → Shrinkage Risk.
Mechanical agitation refers to washer movement such as rubbing, tumbling, spinning, twisting, and compression. These forces can increase fiber interlocking and dimensional changes. These variables may contribute to shrinkage, but the exact risk depends on the specific fabric, construction, and care method used.
How Dryer Heat Can Increase Shrinkage or Distortion Risk
Dryer heat can increase shrinkage or distortion risk when the care label warns against tumble drying or when fabric sensitivity is uncertain. Simple care symbols tell you if a garment allows tumble-drying, requires a do-not-tumble-dry approach, or needs a dry flat setup. Tumble drying remains a high-risk method when the care label forbids it or when fabric risk is unclear.
- Dryer Heat → Raises → Shrinkage / Distortion Risk.
What a Laundry Shrinkage Prevention Routine Checks Before Every Wash
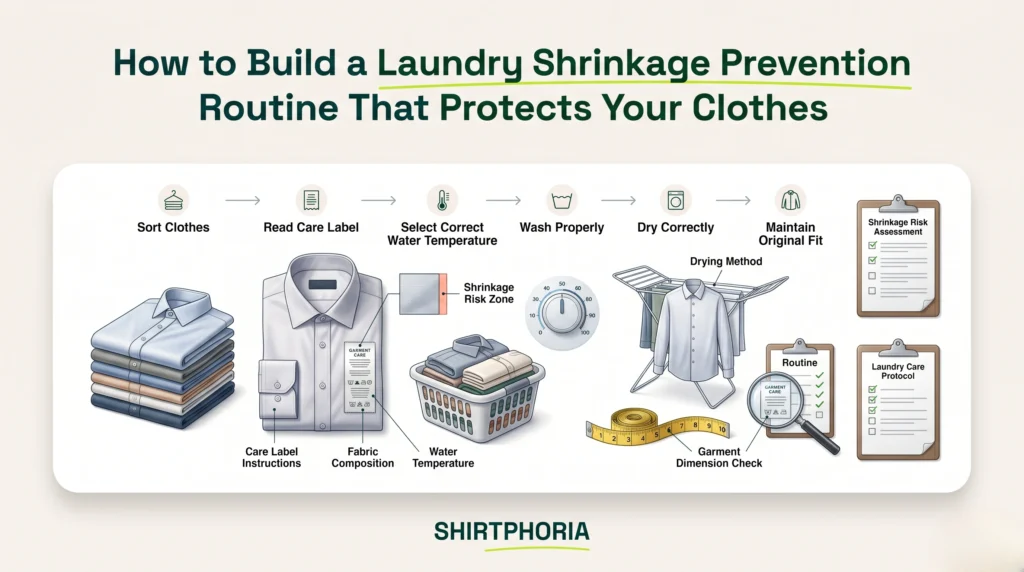
A reliable laundry shrinkage prevention routine checks three variables before every cycle: fabric type, safe water temperature, and drying method. You execute these steps through visible physical checks: reading the label, checking the dial, sorting the basket, verifying the dryer setting, and setting up the drying rack. The routine lowers friction and makes errors less likely, though it does not guarantee safe results for every garment.
How to Check Fabric Type and Water Temperature
The routine begins by reading the care label because the label gives the safest available instruction for fabric care, water temperature, and warnings. The care label is the primary decision authority for safe laundry processing. Guessing a fabric’s material by feel alone is unreliable and increases risk. Cotton, wool, rayon, linen, and synthetic blends behave differently under stress, so caution dictates following the label.
How to Verify the Drying Rule
The drying rule tells you whether the garment can be tumble dried, should be dried flat, or should use another care-label-approved drying method. Drying symbols provide straightforward instructions: a square with a circle indicates tumble drying, an X over it means do not tumble dry, and a square with a horizontal line means dry flat. Air-drying is often a lower-heat fallback when the care label allows it and the drying rule is unclear. Ultimately, the care label serves as the final decision authority.
How a Laundry Shrinkage Prevention Routine Chooses Rules by Fabric Type
Choosing shrink-prevention rules requires matching fabric type with care-label instructions for temperature, agitation, and drying.
| Fabric Type | Water Rule | Agitation Rule | Drying Rule |
|---|---|---|---|
| Cotton | Cold or label-approved temperature | Gentle or normal depending on label | Avoid high heat unless the label allows it |
| Linen | Follow the care label and avoid unnecessary heat or high agitation | Low or label-approved agitation | Air dry or dry flat if label supports it |
| Wool | Follow label; hand wash, wool cycle, or professional care if required | Minimal agitation if wet cleaning is label-approved | Dry flat or professional care if required |
| Rayon/Viscose | Cold/gentle only if label allows wet cleaning | Gentle or hand wash if label-approved | Dry flat unless label says otherwise |
| Synthetic blend | Follow label and consider blended fibers | Label-approved agitation | Label-approved drying |
Framework Note: Always follow the care label first. This table is a general fabric-risk guide for routine planning, not a substitute for manufacturer instructions, textile standards, or garment-specific care requirements.
How a Laundry Shrinkage Prevention Routine Turns Fabric Rules Into a Repeatable Check
Fabric rules are easier to apply consistently when they become a repeatable physical sequence before the washer starts. A structured operational sequence reduces friction. The process becomes easier to repeat over time when users attach it to physical cues. The routine reduces controllable errors, though it cannot remove every shrinkage risk.
How to Link Fabric, Water, Agitation, and Drying Rules to a Repeatable Laundry Routine
The routine should follow a predictable sequence: check fabric type, confirm water temperature, set agitation, and verify drying method before loading the machine. This acts as a laundry pre-flight checklist. This sequence reduces controllable errors by ensuring users verify critical inputs before applying heat or water.
Phase 1: How to Set a Minimum Viable Shrink-Prevention Habit
Phase 1 establishes a Minimum Viable Habit, which makes the first routine step small enough to repeat consistently. Minimum Viable Habit is defined as the smallest repeatable action that starts the routine without making the process feel heavy. These labels are article-specific routine tools, not official behavioral-science or textile-care standards. Repeating the same laundry check in the same context can make the routine easier to remember over time.
How to Define the Smallest Shrink-Prevention Habit
The smallest shrink-prevention habit is one label check before touching the washer dial.
- Minimal Habit → Lowers → Start Friction.
The primary rule states: Before every wash, check fabric type and water temperature once. Executing this step lowers the initial barrier to compliance.
How to Use 30 Laundry Cycles as a Practice Window
A 30-cycle practice window gives you a visible way to repeat the fabric check, but it does not prove permanent habit formation. This window allows you to practice the behavior repeatedly. Repeating the same check in a consistent context can support routine-building, but automaticity varies by person and situation. Thirty cycles is a practical tracking window, not proof of permanent habit formation.
Phase 2: How to Anchor the Fabric Check to Your Laundry Routine
Phase 2 uses the Anchor Protocol to connect the new fabric check to a laundry action that already happens, such as sorting clothes. The Anchor Protocol is an internal routine label designed to simplify task initiation. Using an existing trigger can make the behavior easier to repeat.
How to Link the Habit to Laundry Sorting
A fabric type check becomes easier to repeat when it is linked to a consistent cue, such as sorting lights, darks, or delicate garments. The routine trigger should happen before the washer dial is touched. Associating the new behavior with an established context cue supports consistent execution.
How to Create a Trigger Before the Washer Dial
A trigger statement tells you exactly what to do before the next step in the laundry process. For example: “After I sort delicate garments into the laundry basket, I will check the fabric type and drying rule before touching the washer dial.” A good trigger is physical, visible, and tied to an existing action.
Phase 3: How to Track Fabric, Temperature, and Drying Checks for 30 Wash Cycles
Phase 3 uses a Consistency Matrix to track whether the shrink-prevention checks were completed before each wash. The Consistency Matrix serves as an internal tracking table. Tracking actions supports execution, but the tracking table does not guarantee the outcome.
How to Track Shrink-Prevention Execution Instead of Outcomes
Tracking execution focuses on the controllable behavior: checking fabric, water temperature, and drying method before washing. This acts as the core tracking rule for the system. A care label check and a water temperature rule check function as controllable leading behaviors, whereas shrinkage is a lagging result.
- Procedure Check → Tracks → Leading Behavior.
How to Execute the 30-Cycle Consistency Matrix
To use the 30-cycle Consistency Matrix, mark each cycle immediately after the fabric, water, and drying checks are completed.
Framework Note: The goal of this interactive matrix is to provide visible evidence of repetition. Logging your cycles builds behavioral momentum until the fabric check becomes your default habit.
Phase 4: How to Fix a Broken Shrink-Prevention Chain
Phase 4 uses the System Debrief to treat a missed check as a process problem rather than a personal failure. The System Debrief is an internal missed-step review label. Relying only on memory can be less reliable than using a visible cue and setup.
How to Debrief Missed Steps Without Blame
A missed fabric check can signal friction in the setup, such as a hidden care label, missing drying rack, or rushed sorting process. The goal is identifying the broken cue to fix the workflow. Multiple factors can cause friction, so observing the environment provides better data than focusing on blame.
How to Answer the Four Process-Oriented Debrief Questions
Four debrief questions help identify where the routine broke and what setup change should happen before the next wash:
- What was the distraction?
- Was the sorting anchor visible enough?
- Which fabric check had the most friction?
- What single setup change is needed?
Repair Module: How to Respond When Clothes Already Show Shrinkage
When clothes already show signs of shrinkage, the routine shifts from prevention to cautious mitigation, reshaping, and future-risk reduction. This module focuses on shrinkage mitigation without promising full restoration.
How to Gently Reshape Damp Clothes After Early Shrinkage Signs
Gentle damp reshaping may help with minor distortion, but it cannot reliably restore garments to their original factory dimensions. Damp reshaping involves gently guiding damp fabric back toward its intended shape while it dries. Severe heat-related or felting-related shrinkage may not fully reverse.
How to Stop Further Shrinkage in the Next Wash
To reduce further shrinkage risk, adjust the next wash by lowering controllable stressors: heat, agitation, and dryer exposure. Move this garment to a more cautious method unless the care label says otherwise.
When Shrinkage Cannot Be Fully Reversed
Severe shrinkage may not be fully reversible when heat, felting, or repeated drying stress has changed fabric structure beyond gentle reshaping. Attempting to reverse advanced shrinkage yields uncertain results. Recommend professional care for valuable or high-risk garments.
Phase 5: How to Refine Your Laundry Setup to Reduce Shrinkage Mistakes
Phase 5 introduces the System Refinement Loop, which uses missed-step debriefs to improve the laundry setup before the next wash cycle. The System Refinement Loop functions as an internal setup refinement label that makes mistakes less likely.
How to Reduce Friction Through Environment Changes
Environment changes reduce friction by making the correct action easier to see, reach, and repeat. Practical examples include pinning a visible care guide on the wall, using a separate delicate basket, keeping a drying rack near the washer, or storing mesh bags near the sorting basket.
How to Update Your Laundry Setup After a Missed Step
After a missed step, update one part of the laundry setup so the next cycle has a clearer cue and a lower-friction action. Choose one small, specific environmental change when you process a missed laundry step.
How to Choose Setup Refinements for Common Laundry Friction Points
Setup refinements work best when each friction point receives one concrete if-then correction.
| Biggest Friction Point | New Setup Strategy | Refined Laundry Anchor |
|---|---|---|
| You forget temperature rules | Add a printed fabric guide near the laundry basket | After sorting garments, I will check the guide before setting the dial |
| You use the dryer by habit | Keep the drying rack or hangers near the washer | After pulling garments from the wash, I will choose drying rack first when the label warns against tumble drying risk |
| You wash delicate items with towels | Create a separate delicate basket | Before carrying laundry to the machine, I will secure delicate items in mesh bags |
| Protocol Phase | Laundry Action | Shrinkage Risk Reduced |
|---|---|---|
| MVH | Check fabric + water rule | Wrong temperature |
| Anchor | Tie check to sorting clothes | Forgotten label check |
| Matrix | Mark completed checks | Inconsistent behavior |
| Debrief | Identify missed step | Repeated mistake |
| Refinement | Change laundry setup | Future friction |
How to Use Treatment Boundaries to Avoid Under-Checking or Over-Complicating the Routine
Treatment boundaries keep the routine balanced: too little checking allows shrinkage mistakes, while too much complexity makes the routine hard to repeat.
| Variable | Too Low Harm | Safe Zone | Too High Harm |
|---|---|---|---|
| Water temperature check | Wrong temperature may be used | Check label before selecting setting | Overthinking every normal load slows execution |
| Agitation check | Delicates may receive rough cycles | Use label-approved cycle | Too many rules make the system hard to follow |
| Drying check | Dryer heat may be used by habit | Verify drying symbol before drying | Avoiding all dryers unnecessarily may reduce practicality |
| Habit complexity | User skips the system | One minimal label check | Routine becomes too heavy |
| Tracking frequency | Missed steps go unnoticed | Mark each wash cycle | Tracking fatigue reduces compliance |
How to Use a Checklist to Keep the Laundry Shrinkage Prevention Routine Working
A shrink-prevention checklist keeps the routine visible at the exact moment laundry decisions are made.
The Standard Operating Procedure for Shrink Prevention
Frequently Asked Questions
Common questions about preventing shrinkage and establishing a laundry routine.
Terms Explained
| TERM | DEFINITION |
|---|---|
| Minimum Viable Habit | The smallest repeatable action (e.g., checking the care label once) that starts the routine without making the process feel heavy or overwhelming. |
| Anchor Protocol | An internal routine label designed to simplify task initiation by intentionally connecting a new habit to a physical action that already happens (like sorting clothes). |
| Consistency Matrix | An internal tracking table used to verify if the required fabric, temperature, and drying checks were completed before a given wash cycle. |
| System Debrief | A process-oriented, missed-step review framework focused entirely on finding environmental friction in the laundry setup rather than assigning personal blame. |
| System Refinement Loop | An internal setup refinement label that uses data gathered from a missed step to make one physical improvement to the laundry environment before the next cycle. |
| Mechanical Agitation | Physical washer movement—such as rubbing, tumbling, spinning, twisting, and compression—that increases fiber interlocking and dimensional changes. |
| Damp Reshaping | The cautious process of applying gentle, even tension to damp fabric to guide it back toward its intended block shape, used to mitigate minor distortion. |