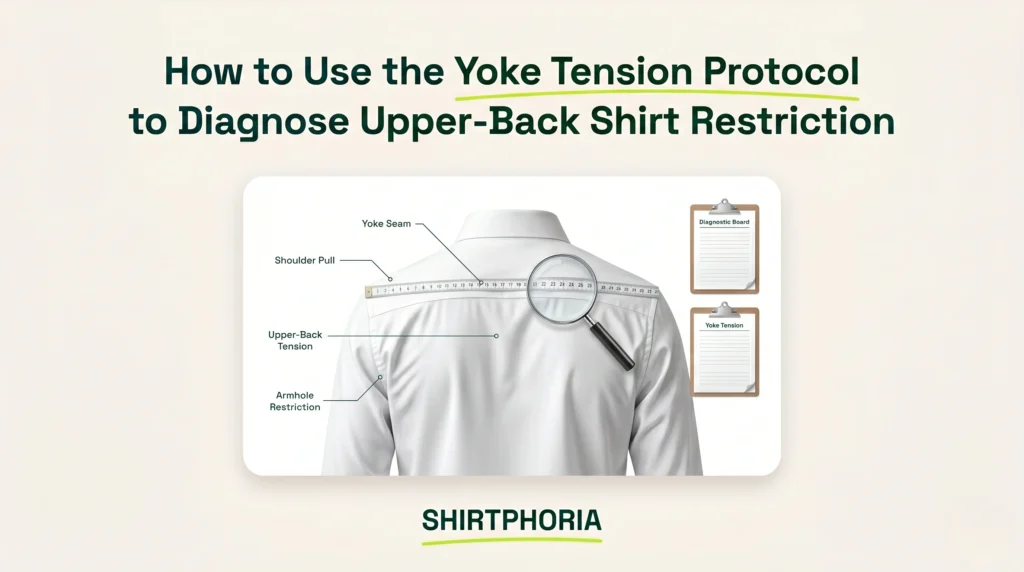
How to Use the Yoke Tension Protocol to Diagnose Upper-Back Shirt Restriction
If your shirt feels tight across the upper back while driving, typing, or reaching forward, the likely issue is not general shirt size alone; it may be a mismatch between yoke width, back-pleat architecture, and forward arm mobility. The Yoke Tension Protocol is a Shirtphoria diagnostic method for testing upper-back shirt restriction. It provides a structured way to isolate upper-back pulling, measure yoke width, run the Steering Wheel Diagnostic, and compare shirts through A/B testing.
Understanding this protocol requires looking at the contrast between static standing drape and dynamic fit. Static standing drape shows how a shirt hangs while the body is relaxed, while dynamic fit shows how the garment behaves when the arms move forward. This protocol does not replace professional tailoring judgment. Instead, it gives users repeatable fit signals before buying, tailoring, or discarding a shirt. All scoring bands, matrices, and test windows discussed here are Shirtphoria protocol heuristics, not universal tailoring laws.
Download the Template Guide
Take the Yoke Tension Protocol offline. Download our printable PDF template to track your wardrobe inventory and keep the A/B test log right in your closet.
What Is the Yoke Tension Protocol for Shirt Mobility?
The Yoke Tension Protocol is a repeatable Shirtphoria shirt-fit diagnostic used to evaluate how well a shirt accommodates forward arm movement across the upper back. It functions as a comparative tool, rather than an industry-standard laboratory test. The goal is to replace vague fit feelings with repeatable observation, scoring, and garment comparison. The protocol is especially useful when a shirt looks clean while standing but feels restrictive during seated or forward-reaching tasks. By standardizing the physical variables, the test produces a useful fit signal, not absolute scientific proof.
How the Yoke Tension Protocol Measures Shirt Mobility
The Yoke Tension Protocol measures shirt mobility by standardizing the physical stress placed on the upper back of a shirt during a controlled forward-reaching position. Standing fit can hide movement restriction because the arms rest at the sides and the upper back remains relatively relaxed. Dynamic fit, by contrast, requires the shirt to accommodate movement across the shoulders, upper back, armholes, and back panel. The protocol compares how different yoke widths, pleat structures, and shirt cuts perform under the exact same test conditions. This measurement remains strictly comparative, pitting one shirt against another shirt on the same wearer.
How the Steering Wheel Diagnostic Reveals Hidden Back Restriction
The Steering Wheel Diagnostic can reveal comparative upper-back restriction by simulating forward-reaching tasks such as steering, typing, or reaching across a desk. It places the upper-back fabric and shoulder area under controlled movement stress. The Steering Wheel Diagnostic simulates forward-reaching tasks. This diagnostic helps isolate garment restriction, but it does not prove the shirt is the only cause of discomfort. Body posture, shoulder mobility, fatigue, and muscle discomfort can influence how tight a shirt feels during the test. The Steering Wheel Diagnostic serves as the protocol’s standard repeat-test pose, not a validated medical assessment.
Who Should Use the Yoke Tension Protocol?
The Yoke Tension Protocol should be used by anyone whose shirt feels acceptable while standing but restrictive during seated or forward-reaching tasks. The best users include commuters, office workers, drivers, desk workers, broad-shouldered individuals, and people comparing slim-fit shirts with mobility-focused shirts. Users who prioritize a clean standing silhouette may tolerate less expansion allowance than users who prioritize daily unrestricted movement.
Why Shirt Yoke Tension Restricts Forward Arm Movement
Shirt yoke tension restricts forward arm movement when the shirt lacks enough horizontal ease or expansion allowance to follow the widening motion of the upper back. Horizontal ease is the baseline extra width across the upper back before the shirt begins pulling. As the arms extend forward, the shoulder blades shift, placing immediate demand on the upper-back fabric and seam tension. According to foundational garment construction texts like David Page Coffin’s Shirtmaking, back fullness and pleats are intentionally built into a pattern to provide movement capacity that a flat panel cannot supply. Forward-reaching tasks increase upper-back movement demand, so a woven shirt with limited horizontal ease may begin pulling across the yoke, armholes, or back panel.
How Forward-Reaching Tasks Expose Yoke Tension
Forward-reaching tasks expose yoke tension because arm extension increases the distance the shirt must cover across the upper back. An arms-down posture keeps the back relatively narrow, while an arms-forward posture physically spreads the shoulder blades. Any fabric slack gets consumed rapidly when the arms move forward. A shirt cut closely for a standing posture may restrict movement during driving, typing, or reaching. This pulling indicates and signals a lack of movement capacity, which suggests an architectural mismatch between the garment and the wearer’s daily physical demands.
How Yoke Width and Back Architecture Affect Shirt Mobility
A shirt’s forward mobility depends on two related fit variables: horizontal ease from yoke width and expansion allowance from back architecture. Horizontal ease is the baseline extra width across the upper back before the shirt begins pulling, a specific Shirtphoria terminology used inside this guide. Expansion allowance is the movement reserve created by pleats, folds, gathers, or extra back-panel fullness, which is also a defined Shirtphoria terminology used here. The causal difference is straightforward: yoke width provides baseline horizontal coverage, while pleat architecture provides movement reserve. A flat back usually offers less expansion reserve than a pleated back, although total mobility also depends on cut, fabric, yoke width, and shirt size. Center box pleats and side pleats can add movement reserve, but they also change the back silhouette. By measuring these variables, the protocol uses tension scores to identify whether the shirt may lack baseline width, movement reserve, or both.
Why Too Little and Too Much Expansion Both Create Fit Problems
Expansion allowance improves mobility only within a useful range; too little causes restriction, while too much can create billowing, poor drape, and excess fabric collapse. A flat back may look clean but restrict broad shoulders or frequent forward-reaching movement. Conversely, excessive pleat volume may improve movement but reduce formal sharpness.
| Variable | Too Low | Useful Range | Too High |
|---|---|---|---|
| Yoke Width | Causes shoulder pulling, seam strain, and reduced forward reach. | Supports shoulder coverage without visible looseness. | Creates dropped shoulder appearance or excess upper-back width. |
| Expansion Allowance | Restricts movement during driving, typing, or reaching. | Adds movement reserve without disrupting the shirt silhouette. | Creates back billowing, fabric folds, or less formal drape. |
| Pleat Volume | Flat back may fail for broad shoulders or active arm use. | Side pleats or center pleat can balance structure and mobility. | Large pleats may add unnecessary fullness for slim builds. |
How to Measure Shirt Yoke Width Before Testing
Measuring shirt yoke width before testing gives the Yoke Tension Protocol a concrete garment variable to compare against your tension score. Yoke width should be measured directly on the shirt, not estimated from your body size. This measurement is used strictly for comparison between shirts, not as a universal perfect-fit number.
How to Measure Yoke Width on a Shirt
Yoke width is measured straight across the back of the shirt from one shoulder seam or yoke-sleeve point to the matching point on the opposite side while the garment lies flat.
- Lay the shirt flat with the back facing upward on a stable surface.
- Smooth the upper back without stretching the fabric.
- Locate the shoulder seam or yoke-sleeve attachment point on each side.
- Measure straight across the back yoke from one side to the matching point on the other side.
- Record the measurement in inches or centimeters.
- Repeat the same measurement method on every shirt used in the A/B test.
Do not pull the fabric tight while measuring because stretched fabric can create a false yoke-width reading. Different shirt constructions place seams differently, so a consistent measurement method matters more than comparing against a universal number.
How to Isolate Fit Variables Before Running the Steering Wheel Diagnostic
Isolating fit variables before testing prevents false tension readings by keeping posture, layers, chair setup, and arm position consistent. The test becomes useful only when the same setup is repeated across multiple shirts. Posture can pre-load the back fabric with tension before the test begins, so the setup must stay consistent. Variable isolation makes the result comparative, not perfect.
How to Control Posture, Layers, and Friction Before Testing
To control testing variables, remove external friction and standardize your body position so the tension signal comes primarily from the shirt.
| Control | Correct Setup | Why It Matters |
|---|---|---|
| Posture | Sit with an upright, natural spine. | Reduces false tension caused by slouching or over-stiff posture. |
| Outerwear | Remove jackets, coats, and heavy layers. | Prevents another garment from trapping or pulling the shirt. |
| Chair | Use a chair without armrests. | Keeps arm movement clean and unobstructed. |
| Arm Angle | Keep both arms parallel to the floor. | Standardizes the test across different garments. |
| Shirt Closure | Button the shirt as normally worn. | Keeps torso tension consistent during comparison. |
| Fabric State | Test the shirt clean, dry, and unwrinkled. | Prevents dampness or fabric distortion from changing the pull sensation. |
How to Run the Yoke Tension Protocol’s 30-Second Steering Wheel Test
Running the Yoke Tension Protocol requires the protocol’s standard 30-second Steering Wheel Diagnostic, which places controlled forward-reaching stress on the shirt’s upper back. The 30-second duration is the Shirtphoria protocol’s standard repeat-test window, not a laboratory timing standard. The test should always be repeated using the same chair, posture, and arm position. The goal is to detect comparative restriction between shirts, not to measure shoulder health or diagnose body pain.
How to Set Your Body Position for the Steering Wheel Diagnostic
Setting your body position correctly ensures the diagnostic tests the shirt’s upper-back mobility rather than random posture or chair interference.
- Sit upright in a chair without armrests.
- Button the shirt as you normally wear it.
- Extend both arms straight forward, parallel to the floor.
- Cross your wrists lightly to simulate a steering-wheel reach.
- Hold the position for 30 seconds.
- Record the tension score immediately after the hold.
Stop the test if you feel body pain rather than garment tension. The test measures shirt restriction, not shoulder health.
How to Score Yoke Tension with the 1–10 Upper-Back Pulling Scale
Scoring yoke tension requires translating upper-back pulling into a calibrated comparative 1–10 score that can be tracked across multiple shirts. The scale is subjective but repeatable when the same user applies it under the exact same test conditions. This score is best used to compare one shirt directly against another. The Upper-Back Pulling Scale is a calibrated comparative scale for repeat self-testing, not a laboratory measurement. The score should reflect garment pulling, not shoulder pain, body fatigue, or poor posture.
How to Score Shirt Yoke Tension from 1 to 10
The Upper-Back Pulling Scale ranks the restriction you feel during the 30-second hold from zero meaningful restriction to critical garment strain. Ensure the score reflects garment tension specifically across the upper back. These ranges are Shirtphoria protocol interpretation bands, not universal tailoring laws.
| Score Range | Sensation Anchor | Protocol Interpretation |
|---|---|---|
| 1–2 | No meaningful pulling; arms extend freely. | Excellent mobility within this test. |
| 3 | Mild awareness of fabric tension but no restriction. | Green signal. |
| 4–5 | Noticeable pulling across the upper back during the hold. | Borderline restriction. |
| 6 | Restriction is clear and likely worsens during long driving or desk work. | High borderline. |
| 7–8 | Strong pulling, shoulder-blade pressure, or visible fabric strain. | Critical restriction signal. |
| 9–10 | Movement feels blocked, seams feel stressed, or the shirt feels unsafe to keep under tension. | Severe restriction signal. |
How to Track Yoke Tension Scores Across Multiple Shirts
Tracking yoke tension scores across multiple shirts isolates which yoke widths and back architectures perform best for your body. Test under similar conditions when possible, because posture, fatigue, and activity level can change how tension feels.
| Day | Shirt Type | Back Type | Yoke Width | Score | Notes |
|---|---|---|---|---|---|
| 1 | Standard office shirt | Flat back | 17.5 in | Baseline. | |
| 2 | Test shirt. | ||||
| 3 | Repeat validation. |
How to Interpret Yoke Tension Protocol Scores with the Signal Matrix
Interpreting your tension score requires using the Shirtphoria Signal Matrix to classify the result as a green, borderline, or critical restriction signal. This matrix serves as the Shirtphoria protocol interpretation framework, not a universal fit law.
| Average Score | Signal Type | Diagnosis | Action Required |
|---|---|---|---|
| 1–3 | Green Signal | Current back architecture and yoke width support the forward-reaching test. | Keep wearing and record as a successful baseline. |
| 4–6 | Borderline Signal | The shirt may feel acceptable briefly but fail during long driving, desk work, or repeated arm extension. | Monitor, compare with another shirt, or test a slightly wider yoke or pleated back. |
| 7–10 | Critical Signal | The yoke may be too narrow, the back may be too flat, or both variables may be limiting forward mobility. | Run an A/B test with a wider yoke or higher-expansion back architecture. |
A critical score does not prove every standing-fit signal is wrong; it shows that static drape alone is not enough to predict dynamic mobility.
Interactive Dashboard: Track Your Yoke Tension
Use this interactive tool to log your shirts and automatically categorize their dynamic fit performance. Your data is saved locally on your device so you can build a personal reference log over time.
| SHIRT | BACK TYPE | YOKE | SCORE | SIGNAL | ACTION |
|---|
How to Fix Yoke Tension Failure with a Yoke and Pleat A/B Test
Fixing yoke tension failure requires comparing your baseline shirt against a controlled alternative with a different yoke width, back pleat structure, or both. A score of 4 or higher justifies testing a different configuration inside this protocol. Changing one major variable at a time when possible yields the clearest feedback. Altering yoke width and pleat architecture simultaneously can make it harder to identify which specific change improved mobility. The goal is not maximum looseness; the goal is the lowest tension score without excessive fabric collapse.
Flat Back
Lowest expansion reserve.
Center Box Pleat
High center expansion.
Side Pleats
Shoulder blade expansion.
Which Yoke and Pleat Architectures Fix Upper-Back Restriction
Different yoke and pleat architectures may reduce upper-back restriction by changing either baseline width, movement reserve, or both. This table gives practical construction guidance, not a hard universal ranking.
| Back Type | Mobility Effect | Best For | Risk |
|---|---|---|---|
| Flat Back | Lowest expansion allowance. | Slim formal fit and clean standing drape. | Higher restriction during forward-reaching tasks. |
| Center Box Pleat | High center-back expansion. | Broad shoulders, commuting, desk work, and frequent arm movement. | May create visible back fullness or billowing. |
| Side Pleats | Controlled expansion near the shoulder blades. | Balanced mobility with a cleaner dress-shirt appearance. | May offer less dramatic improvement than a center box pleat. |
| Wider Yoke | Increases baseline horizontal coverage. | Users who score high before pleat choice is considered. | Too much width can create dropped shoulder appearance or excess fabric. |
Formulate a Testable Hypothesis
A testable hypothesis turns your tension score into a specific garment change that can be validated through repeat testing. If you scored an 8 with a flat-back shirt measuring 17.5 inches across the yoke, your sample hypothesis could be: testing a center box pleat and an 18-inch yoke may reduce my average tension score into the 1–3 range. This is a sample hypothesis, not a factual expectation for every wearer. The hypothesis must include the baseline score, current back type, current yoke width, proposed change, and target score. Body posture, shoulder mobility, and upper-back shape can influence how tight a shirt feels, so the test result should guide decisions rather than promise a universal fix.
Run the 3-Day Commute Test
The 3-Day Commute Test validates whether the proposed yoke or pleat change performs during real movement, not just during a short mirror check. The 3-day test is a Shirtphoria comparison window, not a universal scientific duration.
- Wear the baseline shirt for one commute or work session.
- Record the Steering Wheel Diagnostic score after the session.
- Wear the test shirt for the next two comparable sessions.
- Record each score using the same 1–10 scale.
- Compare the average baseline score against the average test score.
If the average score drops into the 1–3 Green Signal range without obvious back billowing or poor drape, the test configuration has improved dynamic fit within this protocol.
Example A/B Test Result
A successful A/B test produces comparative data that shows which architectural change improved your specific upper-back mobility. The 17.5-inch to 18-inch example is illustrative only.
| Shirt | Back Type | Yoke Width | Baseline Score | After Test Score | Result |
|---|---|---|---|---|---|
| Slim office shirt | Flat back | 17.5 in | 8 | — | Failed dynamic mobility test within this protocol. |
| Mobility test shirt | Center box pleat | 18 in | — | 2 | Showed improved movement reserve for this wearer. |
How to Use the Yoke Tension Checklist Before Buying or Tailoring a Shirt
Use this Yoke Tension Checklist before buying or tailoring a shirt to prioritize dynamic mobility without ignoring clean drape.
Frequently Asked Questions
Common queries about dynamic fit and mobility testing.
Terms Explained
Conclusion
A shirt that fits well while standing can still restrict real-world movement, which is why the Yoke Tension Protocol tests dynamic mobility instead of relying on static drape alone. Experiencing restricted arm mobility requires measuring yoke width, isolating test variables, running the Steering Wheel Diagnostic, scoring tension, and validating improvements through structured A/B testing. The best shirt is not always the tightest or the loosest; it is the shirt whose structure supports your movement without collapsing its shape.
Tracking upper-back restriction before buying or tailoring helps you choose shirts that look clean standing up and still move comfortably in real life.
The Yoke Tension Protocol is an observational heuristic tool designed to assist with evaluating shirt fit and mobility. The scoring bands, matrices, and testing parameters are subjective guidelines created by Shirtphoria, not universal tailoring laws or scientific measurements. This guide does not constitute professional medical, ergonomic, or tailoring advice. Always consult with a professional tailor before making structural alterations to your garments. Stop testing immediately if you experience physical pain.